Some of my favorite desserts are the ones that feel a little nostalgic and a lot effortless. This sweetened condensed milk ice cream recipe takes me straight back to summer evenings when dessert didn’t require fancy tools or complicated steps, just a bowl, a whisk, and a bit of patience while the freezer worked its magic.
What makes this recipe special is how approachable it is. There’s no ice cream machine, no eggs, and no cooking involved. Yet the result is unbelievably rich, smooth, and scoopable.
If you’ve ever wanted to make homemade ice cream but felt intimidated, this recipe is the gentle entry point and the one you’ll keep coming back to.

What Is Sweetened Condensed Milk Ice Cream Recipe?
Sweetened condensed milk ice cream is a no-churn ice cream made by combining whipped cream with sweetened condensed milk and flavorings, then freezing the mixture until set.
The magic lies in the condensed milk. Because it’s already concentrated and sweetened, it prevents ice crystals from forming, giving the ice cream a creamy texture without constant churning.
How It Differs from Traditional Ice Cream
- No eggs or custard base
- No ice cream maker required
- Faster prep time
- Creamier texture with minimal effort
This style of condensed milk ice cream without a machine has become popular for home cooks who want reliable results with very little equipment.
Why You’ll Love This Recipe
- Ultra creamy texture with no icy bite
- Beginner-friendly and foolproof
- No-churn method—no special tools
- Highly customizable with endless flavors
- Perfect make-ahead dessert for gatherings
- Naturally gluten-free
Whether you’re craving classic vanilla or experimenting with mix-ins, this recipe adapts beautifully.
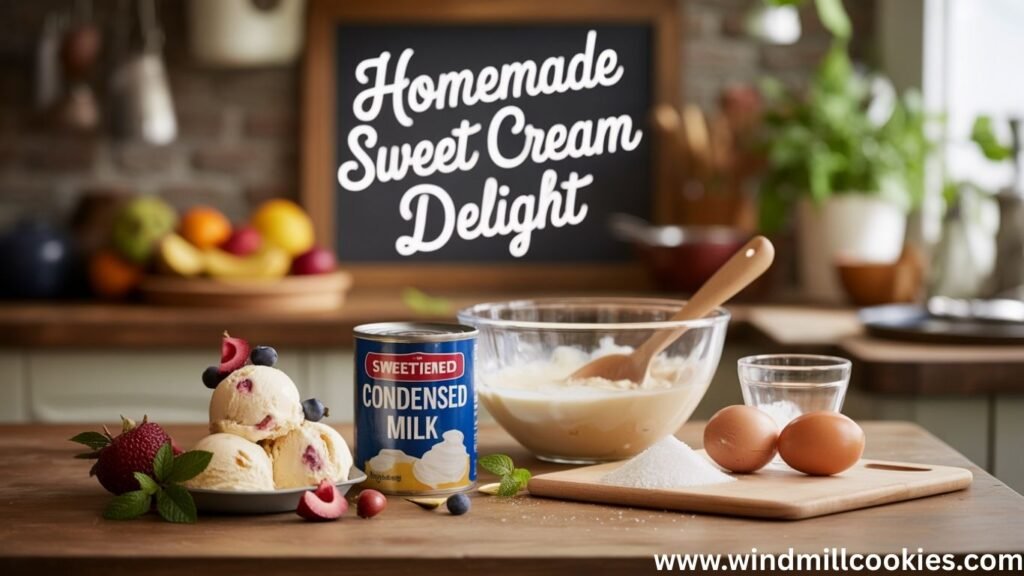
Ingredients Overview
Below is the base recipe that creates a classic vanilla ice cream. From here, variations are endless.
Base Ingredients
- Heavy whipping cream – 2 cups (480 ml): Provides richness and structure when whipped.
- Sweetened condensed milk – 1 can (14 oz / 396 g): Sweetens and softens the ice cream while preventing ice crystals.
- Pure vanilla extract – 2 teaspoons: Adds depth and warmth to the flavor.
- Pinch of salt – about ⅛ teaspoon: Balances sweetness and enhances flavor.
Optional Add-Ins (up to ¾ cup total)
- Chocolate chips
- Crushed cookies
- Swirls of caramel or chocolate sauce
- Fresh fruit purée
Substitutions
- Dairy-free: Use full-fat coconut cream (2 cups) and dairy-free condensed milk.
- Lower sugar: Use reduced-sugar condensed milk (texture will be slightly softer).
- Vegan: Coconut cream + coconut condensed milk works best.
Step-by-Step Instructions
Whip the Cream
Start with cold heavy whipping cream – 2 cups (480 ml) straight from the fridge. Cold cream whips faster and holds air better, giving your ice cream a light, airy texture. Pour it into a large, chilled mixing bowl for maximum volume.
Using a hand or stand mixer, beat on medium-high speed for 3–4 minutes. Watch closely, stop when stiff peaks form. The cream should hold its shape but still look smooth and velvety.
Power tip: Avoid over-whipping. Over-whipped cream turns grainy and heavy, reducing your ice cream’s creamy perfection. Use a spatula to gently fold in other ingredients, keeping the fluff intact for that irresistible, ultra-creamy bite.
Fold in the Condensed Milk
Take sweetened condensed milk – 1 can (14 oz / 396 g) and pour it slowly into the whipped cream. Add 2 teaspoons pure vanilla extract and a pinch of salt (⅛ tsp) for a balanced, rich flavor.
Use a large spatula to gently fold the condensed milk into the whipped cream. The key is slow, deliberate motion—fold, don’t stir. This preserves the airy texture and keeps your ice cream light and fluffy.
Pro tip: Over-mixing deflates the cream, making the ice cream dense. Stop folding once everything is evenly combined, with no streaks. At this stage, your base is perfectly smooth, sweet, and ready for flavorings or mix-ins.
Add Flavorings or Mix-Ins
Once your base is smooth, it’s time to elevate flavor. For chocolate lovers, add ⅓ cup unsweetened cocoa powder or ½ cup chocolate chips. For fruit variations, fold in ½ cup fresh strawberry or mango purée for natural sweetness.
Swirls of caramel or chocolate sauce (¼ cup) create indulgent ribbons, while ¾ cup crushed cookies or nuts add irresistible crunch.
Pro tip: Fold ingredients gently using a spatula to maintain the creamy, airy texture. Avoid stirring aggressively, which can deflate the whipped cream. At this stage, the ice cream is fully customizable, rich, flavorful, and ready to transform into a luscious, no-churn dessert everyone will love.

Freeze
Transfer your creamy mixture into a freezer-safe container; a loaf pan works perfectly. Smooth the top with a spatula for even freezing. Cover tightly with plastic wrap or a lid to prevent ice crystals and preserve ultra-creamy texture.
Place in the freezer for at least 6 hours, ideally overnight, to allow the ice cream to fully set. The longer it rests, the firmer and scoopable it becomes.
Pro tip: For perfectly smooth scoops, let the ice cream sit at room temperature for 5 minutes before serving. Avoid repeated thawing and refreezing, which can compromise texture.
This step locks in flavor and ensures every bite is rich, silky, and decadent.
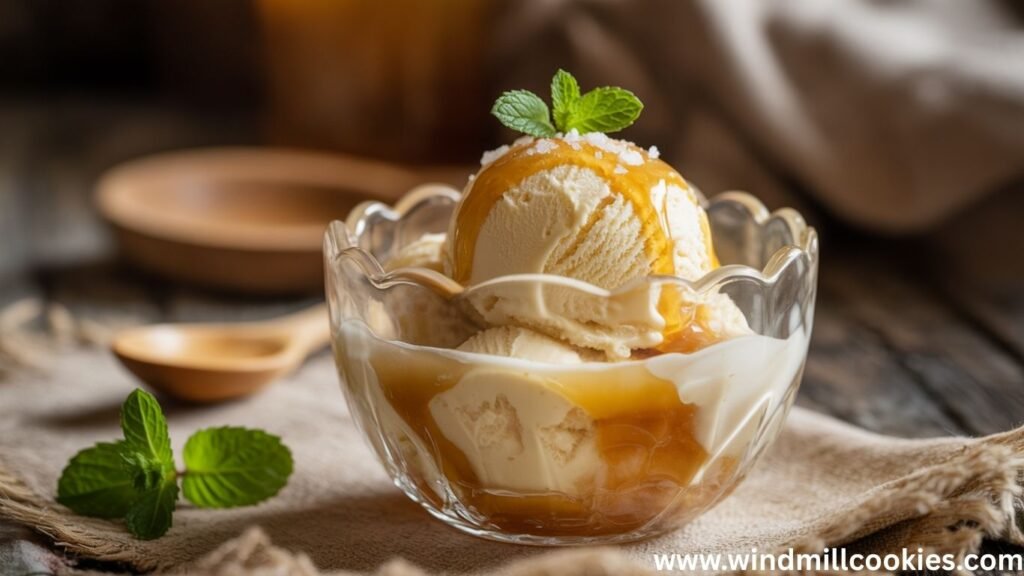
Scoop and Serve
After freezing, let your ice cream sit at room temperature for 5 minutes. This softens the edges, making scooping effortless and preserving the creamy texture.
Use a scoop or large spoon dipped briefly in warm water for perfect, round scoops. Serve immediately in bowls or cones, or layer in a dessert dish with fresh fruit, chocolate sauce, or cookie crumbles.
Pro tip: For added elegance, sprinkle ¼ cup chopped nuts, chocolate chips, or caramel drizzle on top. This elevates flavor and presentation without effort.
Enjoying it straight from the freezer ensures ultra-creamy, melt-in-your-mouth perfection, making every serving a rich, indulgent treat that impresses family and friends alike.
Expert Tips for Best Results
Use cold heavy whipping cream – 2 cups (480 ml) for maximum volume and creamy texture. Whip until stiff peaks form. Over-whipping creates grainy ice cream.
Fold in sweetened condensed milk – 1 can (14 oz / 396 g) gently to preserve airiness. Avoid stirring aggressively; this keeps the ice cream light and fluffy.
Cover tightly with plastic wrap or lid before freezing to prevent ice crystals. Let ice cream sit 5 minutes at room temperature before scooping for smooth, perfect servings.
For flavor, add ¼–¾ cup mix-ins like chocolate chips, fruit purée, or nuts. These expert steps ensure ultra-creamy, silky, and scoopable ice cream every time.
- Use very cold cream for maximum volume when whipping.
- Do not over-whip the grainy cream leads to dense ice cream.
- Fold gently, not stir, to preserve air.
- Cover tightly to prevent freezer burn.
- Cleaner scoops, dip your ice cream scoop in warm water.
Common Mistake: Mixing too aggressively after whipping, which deflates the cream and makes the ice cream heavy.

Variations & Substitutions
This base recipe is fully customizable. For chocolate lovers, add ⅓ cup unsweetened cocoa powder to 1 can (14 oz / 396 g) sweetened condensed milk before folding.
For fruity flair, fold in ½ cup fresh strawberry or mango purée. Nuts, cookie crumbs, or chocolate chips (¼–¾ cup) add crunch and texture.
Dairy-free or vegan? Use 2 cups of coconut cream and 1 can of coconut condensed milk—results are just as creamy and rich.
Want lower sugar? Opt for reduced-sugar condensed milk, keeping in mind the ice cream may be slightly softer.
These simple tweaks make this no-churn ice cream versatile, indulgent, and perfect for every taste and dietary need.
Flavor Variations
- Chocolate: Add ⅓ cup cocoa powder to the condensed milk before folding.
- Strawberry: Fold in ½ cup thick strawberry purée.
- Mango: Use ripe mango purée for a tropical twist.
- Coffee: Dissolve 1 tablespoon instant coffee in 1 teaspoon hot water and mix in.
Dietary Adaptations
- Keto-style (approximate): Use sugar-free condensed milk alternative and whipped cream sweetened with erythritol.
- Vegan: Coconut cream and coconut condensed milk with vanilla.
This flexible base makes it one of the easiest homemade ice cream recipes to personalize.
Storage & Make-Ahead Instructions
Freezer Storage
- Store in an airtight container for up to 2 weeks.
- Press parchment paper directly on the surface to reduce ice crystals.
Make-Ahead Tips
- Prepare 1–2 days in advance for events.
- Flavor improves after resting overnight.
Serving After Freezing: If frozen solid, let it sit at room temperature for 5–8 minutes before scooping.
Frequently Asked Questions
Can I make sweetened condensed milk ice cream without an ice cream maker?
Yes. This is a classic no-churn ice cream recipe designed specifically for home freezers.
Why is my ice cream too hard?
It may have been over-frozen or stored uncovered. Let it soften briefly at room temperature before serving.
Can I use half-and-half instead of heavy cream?
No. Heavy cream is necessary for structure and creaminess.
Is sweetened condensed milk ice cream very sweet?
It is sweet but balanced. Adding salt or unsweetened mix-ins helps control sweetness.
How long does homemade no-churn ice cream last?
For best quality, consume within 1–2 weeks.
Can I refreeze melted ice cream?
It’s not recommended, as texture will suffer.
Is this recipe gluten-free?
Yes, the base recipe is naturally gluten-free.

Final Thoughts and Serving Suggestions
This sweetened condensed milk ice cream recipe proves that homemade ice cream doesn’t need to be complicated to be exceptional. It’s creamy, reliable, and endlessly adaptable, perfect for both casual weeknights and special occasions.
Serve it in crisp cones, pair it with warm brownies, or top it with fresh fruit for a simple dessert that always feels special. Once you try this method, it’s hard to go back to store-bought.
Keep this recipe in your freezer rotation, and you’ll always have a crowd-pleasing dessert ready to scoop.