There’s something magical about a cookie that feels both nostalgic and celebratory, and that’s exactly the feeling I get every time I make my red velvet crinkle cookies recipe.
I first discovered these beauties at a holiday cookie exchange a few years back, and their vibrant color, tender texture, and crackled sugar tops instantly won me over.
Since then, I’ve perfected this recipe so I can recreate those soft, fudgy cookies right at home, whether it’s for Valentine’s Day, Christmas, or just because I’m craving something sweet and special.
These cookies remind me that sometimes, the best desserts are the ones you share with friends and family around the kitchen table.
What are Red Velvet Crinkle Cookies?
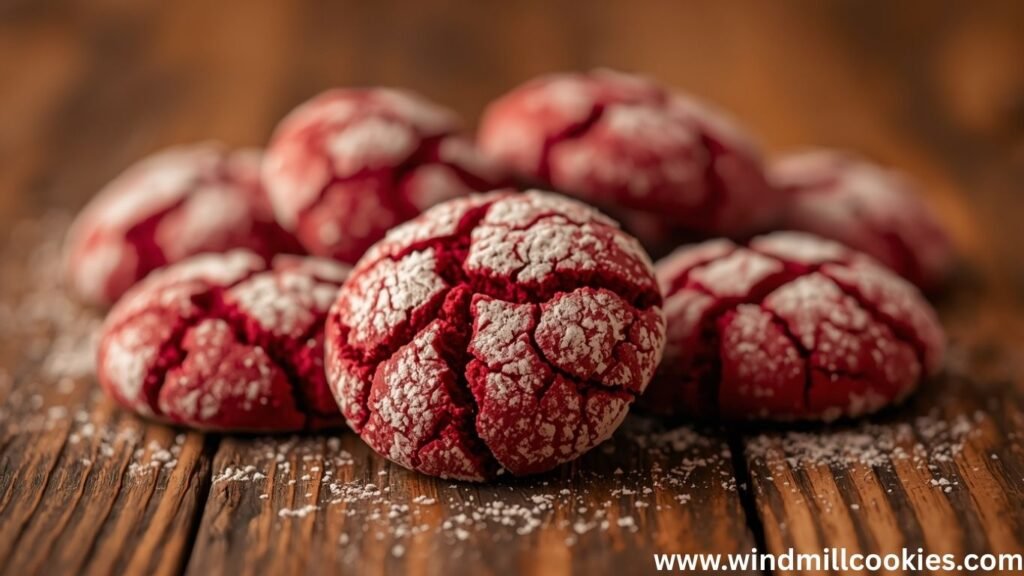
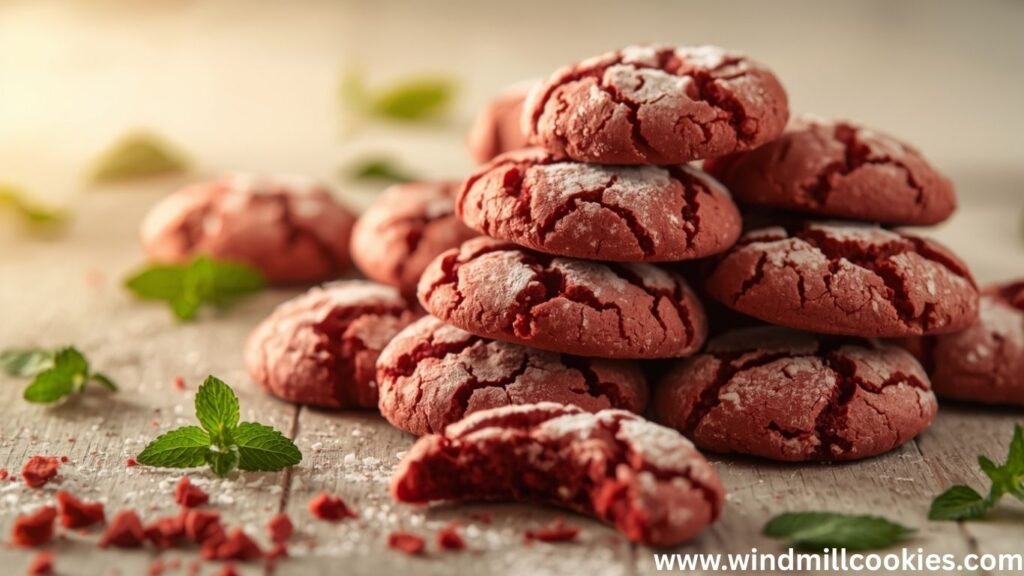
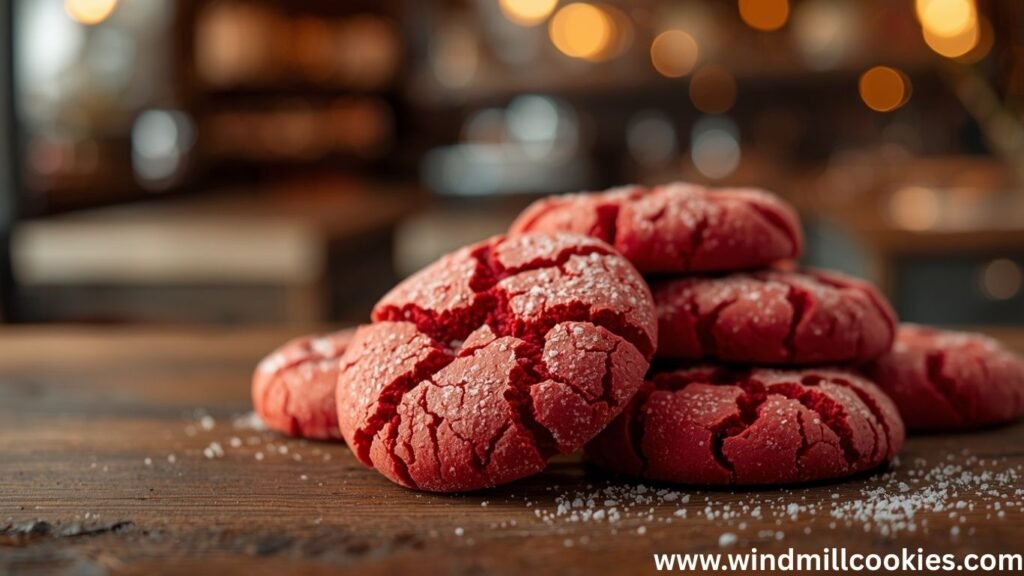
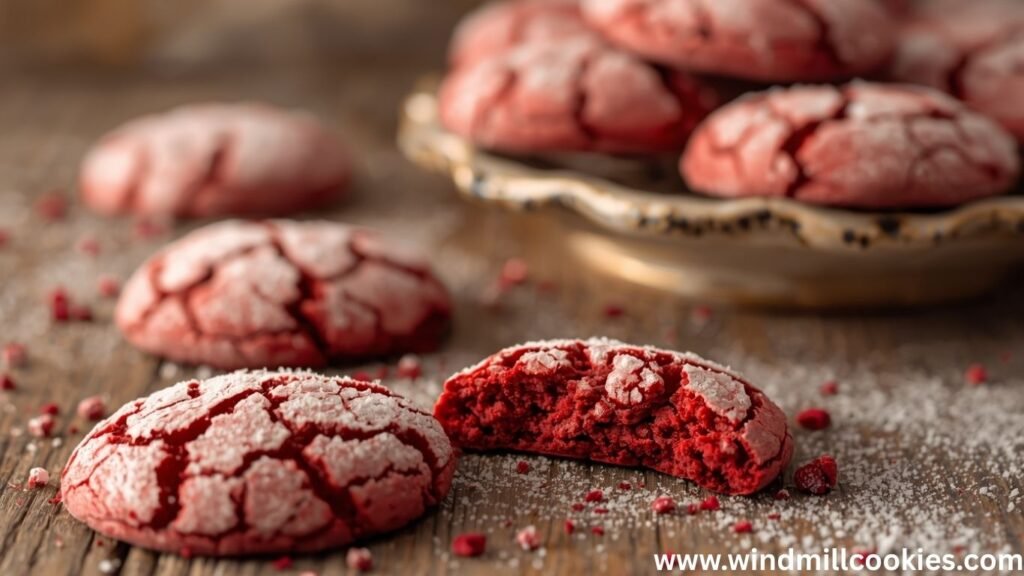
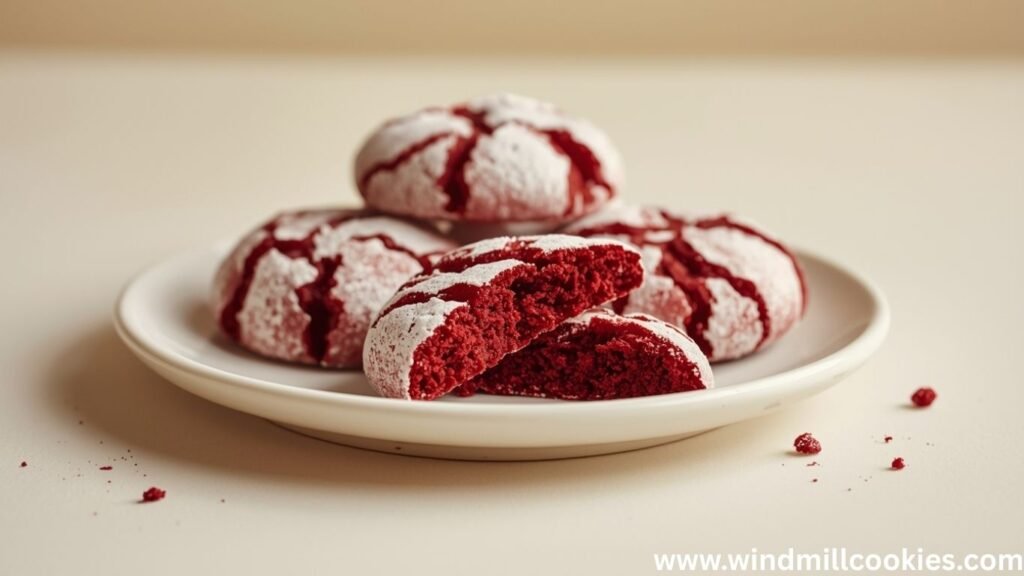
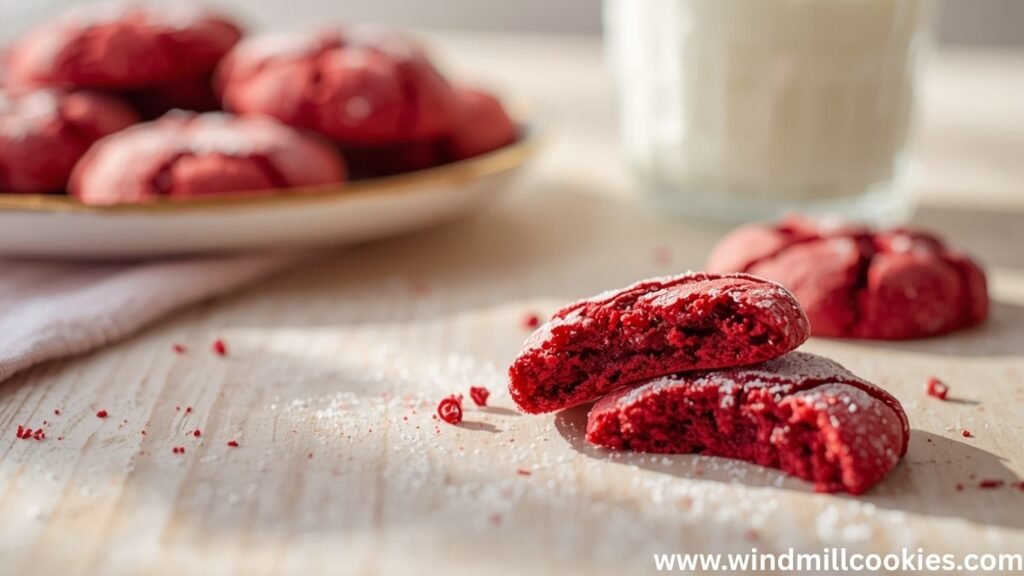
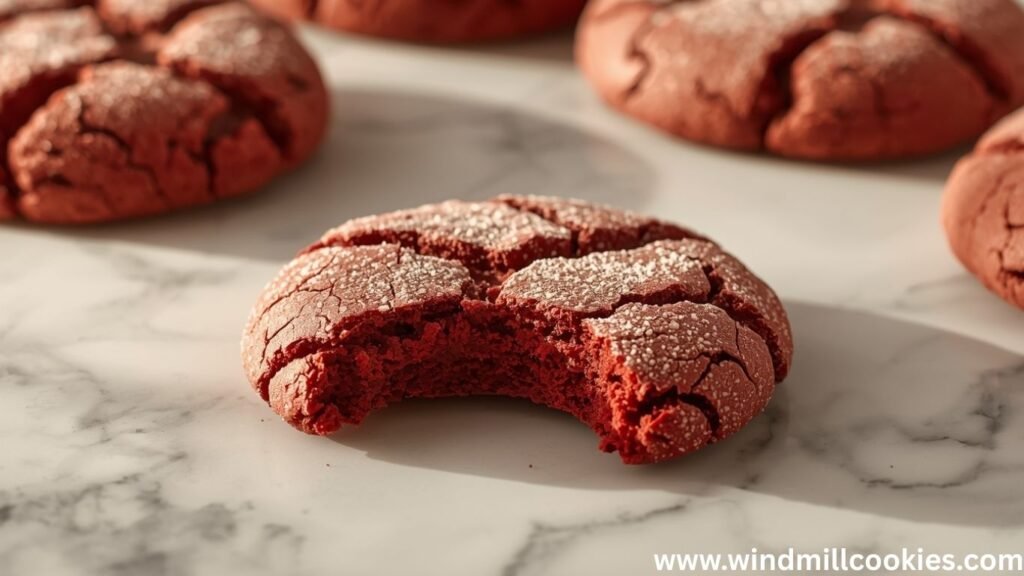
At their heart, these are not your average sugar cookies; they’re soft cookies with a hint of cocoa wrapped in a snowy powdered sugar crust that cracks beautifully during baking.
The signature red color comes from food coloring (or beet powder for a natural option), and the crinkled surface makes them look as festive as they taste.
They combine the richness of red velvet cake with a slightly chewy, tender cookie bite that’s utterly addictive.
While they’re inspired by classic red velvet cake, crinkle cookies are distinct: they’re smaller, sweeter, and boast that fun crackle across the top thanks to the generous sugar coating and baking chemistry.
Why You’ll Love This Recipe
Here’s what makes this red velvet crinkle cookie recipe shine:
- Soft, chewy centers with lightly crisp edges
- Vibrant red color that’s perfect for holidays or gifting
- A beautiful crackle finish that impresses every time
- Easy to make with simple pantry ingredients
- Can be adapted for gluten-free, vegan, or dairy-free diets
Ingredients Overview
Before we dive into baking, let’s talk about the ingredients that make these cookies both beautiful and delicious:
Dry Ingredients
- 2 cups (250g) all-purpose flour: Main structure of the cookie; measure with the spoon-and-level method for best results.
- 1/4 cup (25g) unsweetened cocoa powder: Adds that classic, subtle chocolate flavor without being overpowering.
- 1 tsp baking powder: Helps the cookies rise and develop that soft texture.
- 1/2 tsp salt: Enhances sweetness and balances flavor.
Wet Ingredients
- 1/2 cup (113g) unsalted butter, softened: Provides richness and tenderness.
- 1 cup (200g) granulated sugar: Sweetens and helps with texture.
- 2 large eggs, room temperature: Binds the dough and adds richness.
- 2 tsp vanilla extract: Rounds out the flavor.
- 2–3 tsp red food coloring (gel preferred): For that bold red velvet look.
For the Crinkle Coating
- 1/3 cup (80g) granulated sugar: Helps create a barrier for the powdered sugar.
- 1 cup (120g) powdered sugar: Creates the signature crackle on top.
Substitutions & Dietary Adaptations
- Gluten-Free: Use a 1:1 gluten-free flour blend with xanthan gum.
- Vegan: Replace eggs with flax eggs and use vegan butter.
- Dairy-Free: Swap butter for dairy-free margarine or coconut oil.
- Natural Color: Substitute beet powder or beet juice for red food coloring (results vary slightly).
Step-by-Step Instructions
Prep Your Oven & Pans
Preheating the oven is crucial for perfect red velvet crinkle cookies. Set your oven to 350°F (175°C) to ensure even baking and that tender, chewy texture. A well-heated oven locks in moisture while creating those signature crinkles on top.
Line your baking sheets with parchment paper or a silicone baking mat to prevent sticking and allow easy cookie release. Avoid greasing directly, as it can flatten the cookies and affect the texture.
Spacing matters: leave 2 inches between each cookie. This prevents spreading and ensures uniform browning. Proper preparation here guarantees that your cookies bake evenly, crack beautifully, and come out soft, chewy, and picture-perfect every single time.
Mix Dry Ingredients
Start with precision: in a medium bowl, combine 2 cups (250g) all-purpose flour, 1/4 cup (25g) unsweetened cocoa powder, 1 tsp baking powder, and 1/2 tsp salt. Whisk thoroughly to blend evenly, ensuring no clumps remain.
Sifting cocoa and flour together improves texture, preventing dense spots in your cookies. Baking powder distributes consistently, giving each cookie a perfect rise and softness.
Salt enhances flavor, balancing sweetness without overpowering. This dry mix is the foundation of your red velvet crinkle cookies.
Properly combined, it guarantees uniform color, even crumb, and that signature tender yet slightly chewy bite. Set aside until ready to fold into your wet ingredients, keeping the mixture light and aerated.
Cream Butter & Sugar
Begin with 1/2 cup (113g) unsalted butter, softened, and 1 cup (200g) granulated sugar in a large mixing bowl. Use a hand mixer or stand mixer on medium speed to cream until light, fluffy, and pale about 2–3 minutes.
Proper creaming incorporates air, giving your red velvet crinkle cookies a tender, soft texture and slight lift. Scrape the bowl edges frequently to ensure even mixing and avoid dense spots.
This step sets the foundation for rich flavor and smooth dough. The sugar begins dissolving into the butter, creating a sweet, velvety base.
Achieve a perfect creamy consistency before adding eggs, vanilla, and red food coloring for that iconic red velvet color and decadent taste.
Add Eggs, Vanilla & Color
Once your butter and sugar are perfectly creamed, add 2 large eggs, room temperature, one at a time, mixing well after each addition. This ensures smooth incorporation and prevents curdling.
Next, stir in 2 tsp vanilla extract for rich, aromatic depth that enhances the cocoa and sugar balance. Then add 2–3 tsp red gel food coloring for that bold, signature red velvet hue.
Gel coloring works best to maintain dough consistency without adding extra liquid. Mix gently until fully combined, creating a vibrant, glossy dough.
Properly blending these ingredients ensures your red velvet crinkle cookies will have uniform color, tender texture, and irresistible flavor in every bite.

Combine Wet & Dry
Gradually fold the prepared dry ingredients: 2 cups (250g) all-purpose flour, 1/4 cup (25g) cocoa powder, 1 tsp baking powder, 1/2 tsp salt into the creamed butter, sugar, eggs, vanilla, and 2–3 tsp red gel food coloring.
Use a spatula or wooden spoon, mixing gently until just combined. Overmixing can create dense, tough cookies instead of tender, soft crinkles.
Aim for a smooth, cohesive dough with no streaks of flour remaining. The color should be vibrant and uniform.
Properly combining wet and dry ingredients ensures your red velvet crinkle cookies bake evenly, hold their shape, and develop that perfect soft, chewy texture with signature crinkle tops.
Chill the Dough
If your dough feels soft or sticky, chilling is a game-changer. Place the combined red velvet crinkle cookie dough in the refrigerator for 30–60 minutes.
Chilling firms the dough, making it easier to scoop and shape into uniform balls. It also helps control spreading during baking, ensuring each cookie keeps its soft, slightly thick center and develops those perfect crinkles.
Even if not strictly required, this step enhances texture, color, and appearance. When ready, remove dough from the fridge, scoop tablespoons, and roll in sugar.
Properly chilled dough guarantees red velvet crinkle cookies that bake evenly, stay tender, and impress with stunning, festive crackled tops every time.
Shape & Coat
Scoop level tablespoons of your chilled red velvet crinkle cookie dough and roll each into a smooth ball. Aim fa or consistent size to ensure even baking and uniform crinkles.
First, roll each ball in 1/3 cup (80g) granulated sugar to create a thin, even layer. Then generously coat in 1 cup (120g) powdered sugar for the iconic crackled effect.
The double coating enhances texture, sweetness, and visual appeal. Place cookies 2 inches apart on a parchment-lined baking sheet to prevent sticking and allow proper spreading.
Proper shaping and coating guarantee tender, chewy centers, crisp edges, and stunning, festive crinkle patterns that make these cookies irresistible and photo-perfect every time.
Bake
Preheat your oven to 350°F (175°C) and ensure baking sheets are lined with parchment paper. Place the prepared red velvet crinkle cookie dough balls, coated in sugar, 2 inches apart to allow even spreading.
Bake for 9–12 minutes, until the tops are set and cracks appear. The centers should look slightly soft; this ensures a tender, chewy texture once cooled.
Avoid overbaking, which can dry out cookies and reduce that iconic melt-in-your-mouth softness. Rotate baking sheets halfway for consistent browning.
Once baked, allow cookies to rest 5 minutes on the sheet before transferring to a wire rack. This simple yet precise baking step guarantees perfect, soft, chewy, and beautifully crinkled cookies every batch.
Cool
After baking, let your red velvet crinkle cookies rest on the parchment-lined baking sheet for 5 minutes. This brief cooling period allows the cookies to firm slightly while retaining soft, chewy centers.
Carefully transfer each cookie to a wire rack to cool completely. Proper airflow prevents sogginess and maintains crisp edges while preserving tender interiors.
Avoid stacking cookies while warm, as this can cause sticking and lose the delicate crinkled texture. Cooling fully also enhances flavor and makes handling easier for storage or serving.
Following this step ensures your cookies hold their shape, show off their signature crackled tops, and deliver that irresistible soft, melt-in-your-mouth bite in every single piece.
Expert Tips for Best Results
Use 1/2 cup (113g) unsalted butter, softened, ed and 1 cup (200g) granulated sugar at room temperature for smooth creaming and tender texture.
Chill the red velvet crinkle cookie dough for 30–60 minutes to prevent excessive spreading and ensure uniform, thick cookies.
Roll each dough ball first in 1/3 cup (80g) granulated sugar, then 1 cup (120g) powdered sugar to create bold, contrasting cracks.
Bake at 350°F (175°C) for 9–12 minutes, removing slightly soft to preserve chewiness.
Avoid overmixing flour; it can toughen cookies.
Use gel food coloring for vibrant red without altering the dough consistency.
- Rotate baking sheets halfway for even browning and perfect crinkly tops in every batch.
- Double Sugar Roll: Roll first in granulated sugar, then in powdered sugar to prevent the powdered sugar from dissolving into the dough and to enhance crinkle contrast.
- Don’t Overbake: Cookies should be soft in the center when removed — they’ll firm up as they cool.
- Quality Cocoa: Good unsweetened cocoa enhances flavor even though it’s in a small amount.
- Use Gel Food Coloring: Gel pigments deliver vivid red without adding excess liquid.
- Chill If Needed: Sticky dough benefits from chilling for the best shape and crinkled texture.
Variations & Substitutions
Transform your red velvet crinkle cookies with simple tweaks. Add 1/2 cup (90g) white chocolate chips for a rich, sweet twist that melts perfectly in every bite.
For vegan cookies, replace 2 large eggs with 2 flax eggs and use 1/2 cup (113g) vegan butter instead of regular butter. The dough remains soft and chewy while staying plant-based.
Make gluten-free by swapping 2 cups (250gof ) of all-purpose flour with a 1:1 gluten-free flour blend containing xanthan gum. Texture stays tender, with no compromise on flavor.
For natural color, replace 2–3 tsp red gel food coloring with beet powder or beet juice, achieving a softer, earthy red without synthetic dyes. These substitutions keep cookies festive, flavorful, and customizable.
- White Chocolate Chip Red Velvet Cookies: Fold in 1/2 cup of white chocolate chips for extra richness.
- Vegan Red Velvet Crinkle Cookies: Make flax eggs and use plant-based butter for a vegan-friendly version.
- Lower Sugar Version: Reduce sugar in the dough and try a light dusting of powdered sugar instead.
- Beet-Powder Colored: For a more natural approach, use beet powder to tint the dough — color will be slightly softer.
Storage & Make-Ahead Instructions
- Room Temperature: Store cooled cookies in an airtight container for up to 4–5 days.
- Freezing Dough: Shape and roll the dough balls, then freeze on a tray before transferring to a bag for up to 3 months: Bake straight from frozen, adding 1–2 extra minutes.
- Baked Cookies: Freeze baked cookies in an airtight container for up to 1 month. Thaw at room temperature when ready to enjoy.
Frequently Asked Questions (FAQ)
What makes cookies crinkle?
The powdered sugar coating combined with heat causes the dough to expand and crack, creating that iconic crinkled effect.
Can I make these gluten-free?
Yes, just substitute a 1:1 gluten-free flour blend with xanthan gum.
How can I make them vegan?
Use flax eggs and vegan butter or coconut oil in place of regular eggs and butter.
Why are my cookies spreading too much?
This can happen if the dough is too warm or sticky; chilling before baking helps control the spread.
Can I use natural food coloring?
Yes, beet powder or juice can be used, though your cookies may be less intensely red.
What’s the best cocoa powder for these cookies?
Use high-quality unsweetened cocoa; Dutch-processed gives a deeper color, while natural cocoa keeps flavor bright.
Final Thoughts / Serving Suggestions
These red velvet crinkle cookies are more than just a treat; they’re a conversation starter. Serve them with milk, coffee, or even a dollop of cream cheese frosting for an elevated dessert.
They shine on holiday cookie platters, make delightful gifts, and are simply a joy to bake with kids or friends.
Once you taste that tender crumb and sweet crackled top, you’ll understand why this recipe has become a favorite in my kitchen. Happy baking!