
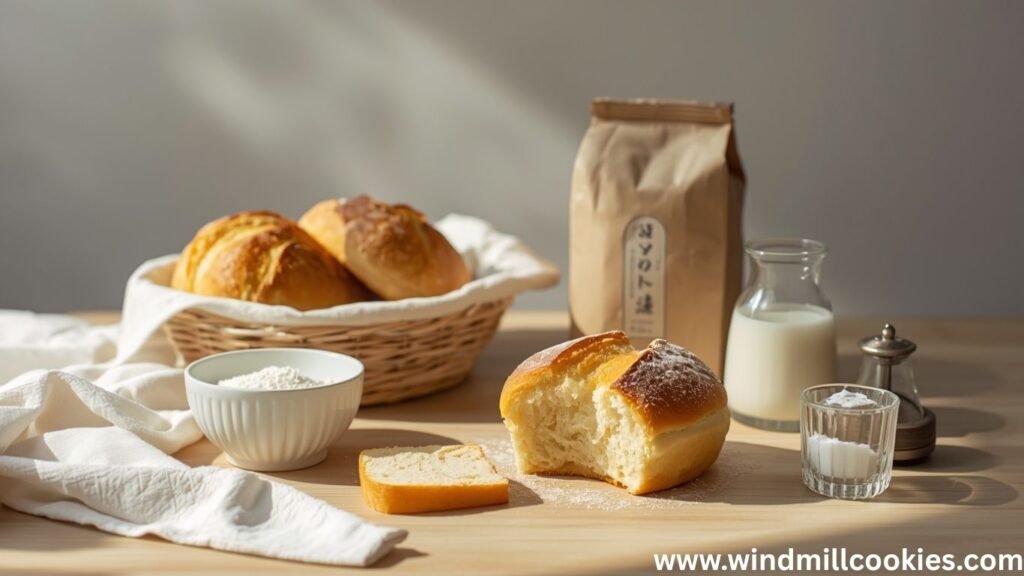
The first time I baked a truly perfect loaf of Japanese milk bread, I remember pulling it out of the oven and being amazed by how unbelievably soft it felt, almost like a cloud in my hands.
That delicate texture, slightly sweet flavor, and pillowy crumb instantly reminded me why this bread is loved worldwide.
This Japanese milk bread recipe has become one of my go-to bakes whenever I want something comforting yet impressive.
Whether you’re making it for breakfast toast, sandwiches, or simply enjoying it warm with butter, it never disappoints.
After testing multiple versions, I’ve refined this method to be beginner-friendly while still delivering that signature bakery-quality softness.
If you’ve ever wondered how to make ultra-soft bread at home, you’re in the right place.
What is the Japanese Milk Bread Recipe?
Japanese milk bread, also known as Hokkaido milk bread, is a soft, slightly sweet white bread known for its airy, fluffy texture.
What makes it unique is the Tangzhong method, a technique where a portion of flour and liquid is cooked into a paste before being added to the dough.
This method helps the bread retain more moisture, resulting in a longer shelf life and that signature cotton-soft crumb.
Compared to traditional white bread:
- It’s softer and more elastic
- It has a slightly sweet, rich flavor
- It stays fresh longer without drying out
This bread is commonly used for milk bread rolls, sandwich loaves, and even sweet buns.
Why You’ll Love This Recipe
- Ultra-soft and fluffy texture that stays fresh for days
- Slightly sweet flavor perfect for both sweet and savory uses
- Beginner-friendly method with clear steps
- Uses simple pantry ingredients
- Ideal for sandwiches, toast, or breakfast bread
- Versatile for variations like rolls or filled buns
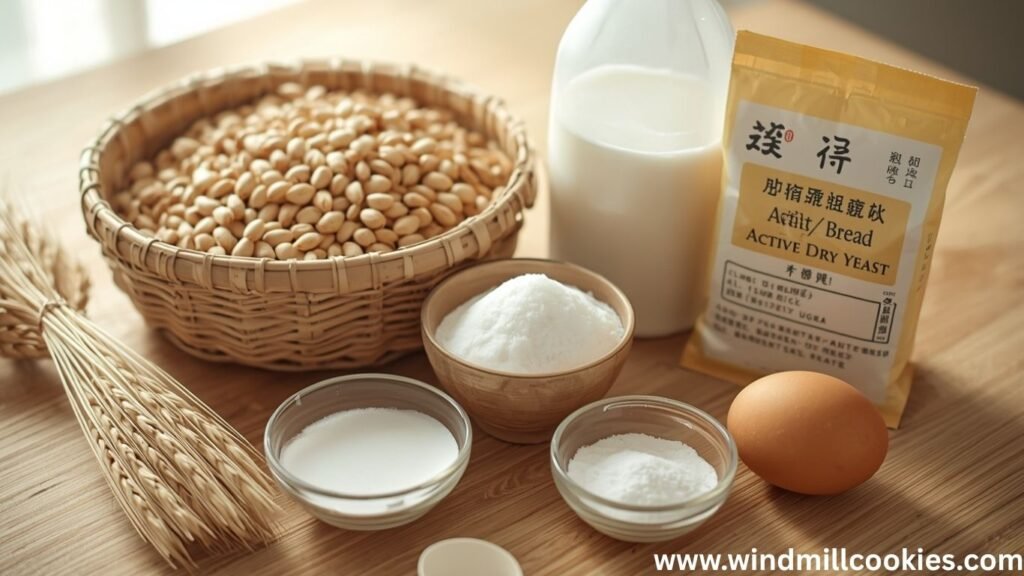
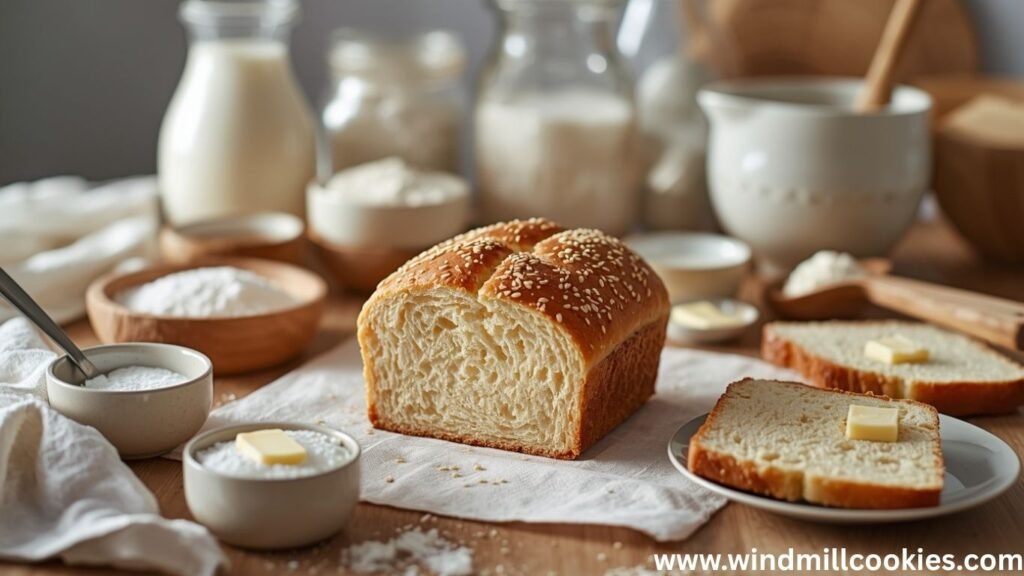
Ingredients Overview
Here’s everything you’ll need for this homemade milk bread:
Tangzhong (Starter Paste)
- 3 tbsp (25g) bread flour
- ½ cup (120ml) milk
- ¼ cup (60ml) water
This paste is the secret to achieving soft, moist bread.
Dough
- 2 ½ cups (320g) bread flour
- 2 tbsp (25g) sugar
- 1 tsp salt
- 2 tsp (7g) instant yeast
- ½ cup (120ml) warm milk
- 1 large egg
- 3 tbsp (40g) unsalted butter (softened)
Optional Egg Wash
- 1 egg + 1 tbsp milk
Ingredient Notes & Substitutions
- Bread flour gives better structure, but all-purpose flour works in a pinch
- Use plant-based milk for a dairy-free version
- Replace butter with vegan butter if needed
- Instant yeast can be swapped with active dry yeast (activate first)
Step-by-Step Instructions
Prepare the Tangzhong
- Start with 3 tbsp bread flour, ½ cup milk, and ¼ cup water. Whisk smooth. No lumps.
- Place the pan on medium heat. Stir nonstop. Use gentle heat. Watch texture closely.
- Mixture thickens fast. Turns glossy paste. Lines form in the pan. That’s your cue. Remove now. Do not overcook.
- This step builds ultra-soft crumb. Locks moisture deep. Gives bakery-style texture. Essential method.
- Let the paste cool fully. Warm paste ruins dough. Plan.
- For best results, use whole milk. Rich flavor. Better softness.
- Perfect Tangzhong feels smooth, thick, and silky. Not dry. Not runny.
- This simple step transforms your bread. Big difference. Professional results at home.
Mix the Dough
- Use 2½ cups bread flour, 2 tbsp sugar, 1 tsp salt, 2 tsp yeast. Add to bowl. Mix dry first. Even blend.
- Pour in ½ cup warm milk. Add 1 egg. Add cooled Tangzhong. Start mixing. Soft dough forms.
- Use a hand or a mixer. Low speed first. Then medium. Dough turns smooth. Slightly sticky feel. That’s perfect.
- Add 3 tbsp soft butter. Mix again. Dough absorbs slowly. Keep mixing. Texture improves fast.
- Scrape bowl sides. Keep the dough together. No dry flour left.
- The goal is soft, elastic dough. Not dry. Not wet. Balanced texture.
- This step builds structure. Strong base. Better rise. Perfect crumb later.
Knead the Dough
- Transfer the soft dough to a clean surface. Light flour only. Avoid excess. Keep the dough soft.
- Use both hands. Push, fold, turn. Repeat rhythm. Build strong gluten.
- Knead 10–12 minutes. Dough becomes smooth, elastic, and slightly tacky. Perfect feel.
- Add small flour only if needed. Do not dry the dough. Soft dough gives fluffy bread.
- Test with the windowpane method. Stretch gently. Thin sheet forms. No tearing. Ready stage.
- Butter inside the dough melts fully. Texture turns silky, rich, and flexible.
- If using a mixer, knead at medium speed for 8–10 minutes. Watch texture closely.
- Well-kneaded dough ensures a high rise. Light crumb. Bakery-quality softness. Essential step.
First Rise
- Lightly grease the bowl with 1 tsp oil. Place the dough inside. Coat the surface lightly. Prevent dry crust.
- Cover bowl with lid or wrap. Keep a warm spot. Ideal temp 25–30°C. No cold air.
- Rest the dough 60–90 minutes. Time may vary. Watch size, not clock.
- The dough should double. Soft, airy, puffy look. Gentle press leaves a slight dent. Perfect proof.
- This stage builds flavor depth. Improves texture. Creates light crumb. Essential step.
- Avoid overproofing. Dough collapses later. Weak structure forms.
- Use a large bowl. Give space to expand.
- Perfect first rise means better volume. Better softness. Bakery-style results every time.
Shape the Dough
- Punch down risen dough. Release trapped air. Keep texture soft.
- Divide into 3 equal parts. Use scale if possible. Each piece is of even size. Better bake.
- Roll each piece flat. Use light flour. Form an oval shape. Smooth surface.
- Fold sides inward. Roll tight, log. Seal edges well. No gaps.
- Place logs in a greased loaf pan. Use 1 tsp oil or butter. Keep spacing even.
- Smooth top surface. Neat shape gives clean slices. Professional look.
- Do not overwork the dough. Handle gently. Preserve air structure.
- Proper shaping builds layers. Improves rise. Creates signature fluffy pull-apart texture. Perfect finish.
Second Rise
- Cover the loaf pan with a cloth or wrap. Keep a warm place. Stable heat works best.
- Rest the shaped dough for 30–45 minutes. Watch size closely. Dough rises above the pan edge.
- Surface looks smooth, puffy, airy. Gentle press springs back slowly. Perfect proof.
- Use a light coating of oil on the cover. Prevent sticking on top. Keep your shape clean.
- Do not rush this step. Final rise builds volume. Creates ultra-soft texture.
- Avoid overproofing. Dough may collapse. Weak structure forms during bake.
- Optional: brush 1 egg + 1 tbsp milk before baking. Adds shine. Rich color.
- Perfect second rise ensures a tall loaf. Light crumb. Bakery-style softness every time.
Bake
- Preheat oven to 180°C. Full heat ready. Even baking starts here.
- Brush the top with 1 egg + 1 tbsp milk. Gives shine. Rich golden crust.
- Place the pan on the center rack. Bake 25–30 minutes. Watch the color closely.
- Top turns deep golden. Smells rich, sweet, buttery. Perfect signal.
- Tap the loaf top. Hollow sound means done. Check the base too.
- If top browns fast, cover loose foil. Prevent burn. Keep inside soft.
- Internal temp near 88–90°C gives the best result. Soft crumb stays moist.
- Remove from pan quickly. Avoid the steam trap. Keeps crust light.
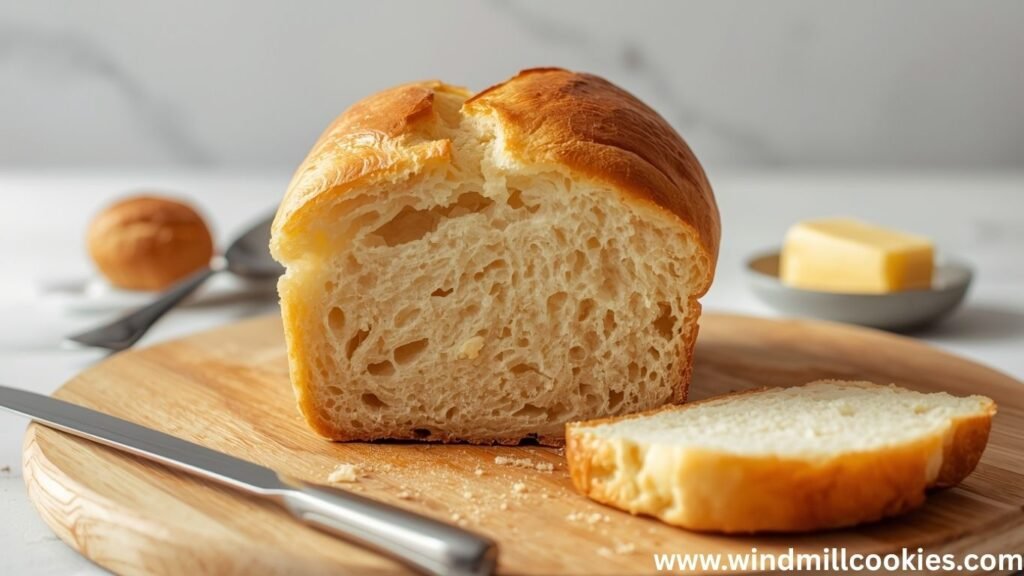
- A perfect bake gives a fluffy texture. Fine crumb. Bakery-quality finish.
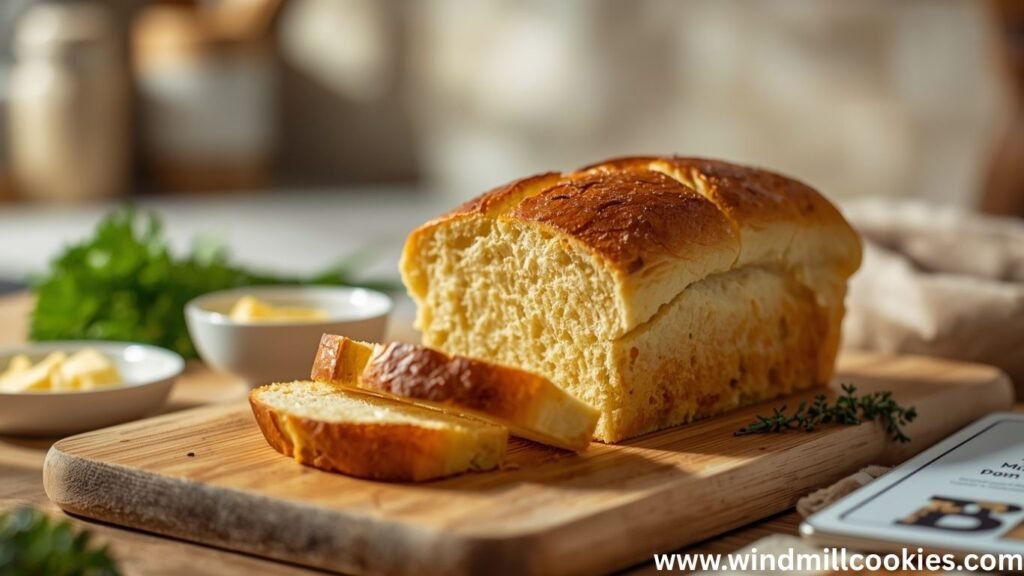
Cool and Serve
- Remove the hot loaf from the pan. Do this fast. Prevent a sogy base.
- Place on a wire rack. Air flows around. Keeps crust light.
- Cool at least 30–40 minutes. Do not slice early. Steam inside needs time.
- Hot slicing ruins texture. Crumb turns gummy. Wait for the best result.
- Use a sharp bread knife. Cut clean slices. Soft layers show clearly.
- Serve warm with 1–2 tbsp butter. Add jam or honey if desired. Simple, rich taste.
- This bread stays soft for hours. Perfect for breakfast or snacks.
- Enjoy fresh slices daily. Light, fluffy, bakery-style comfort at home.
Expert Tips for Best Results
- Use 2½ cups of bread flour. High protein gives strong dough. Better rise.
- Measure ½ cup of milk, warm. Not hot. Yeast stays active. Dough rises fast.
- Use 3 tbsp soft butter. Mix slowly. Builds rich, silky texture.
- Do not skip Tangzhong. Key method. Locks moisture deep. Ultra-soft crumb.
- Knead until smooth and elastic. The windowpane test must pass. Strong gluten forms.
- Avoid excess flour. Keep the dough slightly sticky. Soft dough = fluffy bread.
- Proof in a warm spot. 25–30°C ideal. Cold slows rise.
- Watch dough, notthe clock. Double size means ready. Perfect timing.
- Bake until golden brown. Do not overbake. Keeps bread soft, moist, tender.
Getting that perfect fluffy texture requires a few key techniques:
- Don’t skip the Tangzhong, it’s essential for softness
- Knead until you pass the windowpane test (stretch without tearing)
- Use warm (not hot) milk to activate yeast properly
- Avoid adding too much flour; slightly sticky dough is ideal
- Let the bread cool before slicing to maintain structure
Common Mistakes to Avoid
- Overbaking (leads to dryness)
- Under-kneading (dense texture)
- Skipping the second rise
Variations & Substitutions
- Add 2 tbsp hof oney to the dough. Sweeter flavor. Soft, rich crumb.
- Mix ¼ cup raisins or chocolate chips. Fun, tasty twist. Evenly layer the dough.
- Brush 1 tbsp garlic butter on top. Savory option. Perfect for sandwiches.
- Use ½ cup plant-based milk. Dairy-free version. Keeps an oft texture.
- Replace 3 tbsp butter with vegan butter. Rich, tender crumb stays intact.
- Swap 2½ cups bread flour with 25–30% whole wheat. Slightly denser, healthy option.
- Shape into rolls or buns instead of a loaf. Bake 15–20 minutes. Fluffy, pull-apart bread.
- These simple tweaks make a versatile bread. Enjoy sweet, savory, vegan, or classic.
- This easy milk bread recipe is highly versatile:
Flavor Variations
- Add honey for a sweeter loaf
- Mix in chocolate chips or raisins
- Brush with garlic butter for savory bread
Shape Variations
- Make milk bread rolls instead of a loaf
- Shape into buns for sandwiches
- Create stuffed bread with cream or custard
Dietary Adaptations
- Use dairy-free milk and vegan butter
- Swap sugar with coconut sugar or honey
- Use whole wheat flour (replace 25–30% only for the best texture)
Storage & Make-Ahead Instructions
- Room Temperature: Store in an airtight container for up to 3 days.
- Refrigeration: Not recommended, as it can dry out the bread.
- Make-Ahead Tip: Prepare the dough the night before and let it rise slowly in the fridge.
Freezing
- Wrap slices individually and freeze for up to 2 months.
- Reheat in a toaster or oven for best results.
Frequently Asked Questions (FAQ)
What makes Japanese milk bread so soft?
The Tangzhong method locks in moisture, creating a soft and fluffy texture that lasts longer.
Can I make Japanese milk bread without bread flour?
Yes, but bread flour gives better structure. All-purpose flour works with slightly less chewiness.
How do I know if my dough is kneaded enough?
Perform the windowpane test—stretch the dough; it should form a thin membrane without tearing.
Why didn’t my milk bread rise properly?
This can happen if the yeast is inactive or the dough wasn’t kept warm enough.
Can I use this recipe for rolls?
Absolutely. Divide into smaller portions and bake for 15–18 minutes.
How do I keep milk bread soft for longer?
Store it airtight and avoid refrigeration. The Tangzhong already helps extend freshness.
Is this recipe suitable for beginners?
Yes, this Japanese milk bread recipe is beginner-friendly with simple steps and forgiving dough.
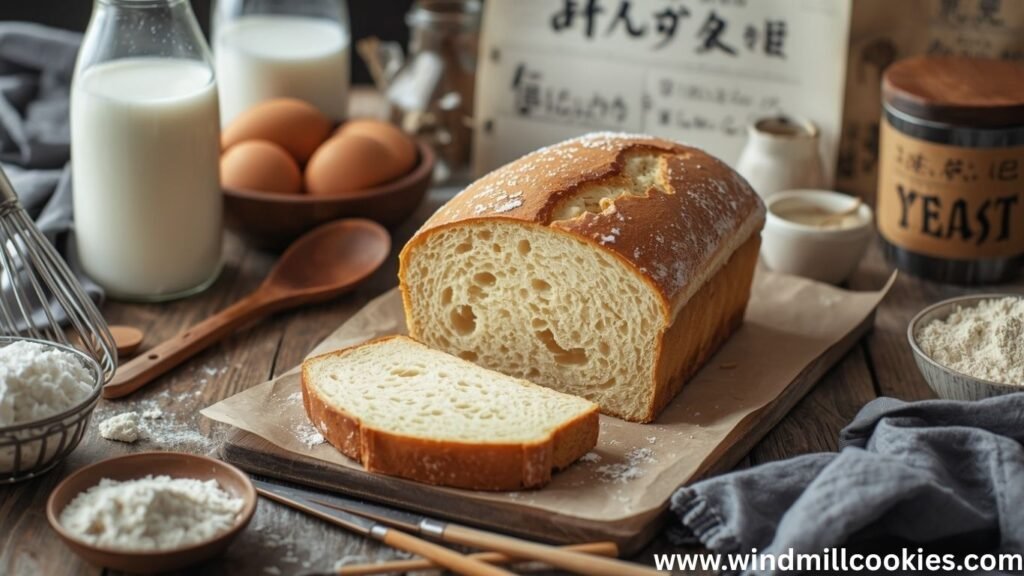
Final Thoughts / Serving Suggestions
This Japanese milk bread recipe is one of those timeless bakes that feels both comforting and impressive. The soft, airy texture and subtle sweetness make it incredibly versatile.
I love serving it:
- Toasted with butter and jam
- As sandwich bread
- Alongside tea or coffee
- Turned into French toast for breakfast
Whether you’re baking for your family or simply treating yourself, this bread delivers bakery-quality results at home. Once you try it, you’ll understand why it’s a staple in so many kitchens.