Every winter growing up, hot cocoa was a ritual in my kitchen. The kettle would whistle, mugs would come out, and something chocolatey would be stirred together with care.
But as I started cooking more intentionally, testing recipes for friends with allergies, dairy sensitivities, or simply different preferences, I realized how limiting traditional mixes can be. Most store-bought versions rely heavily on dry milk powder, which doesn’t work for everyone.
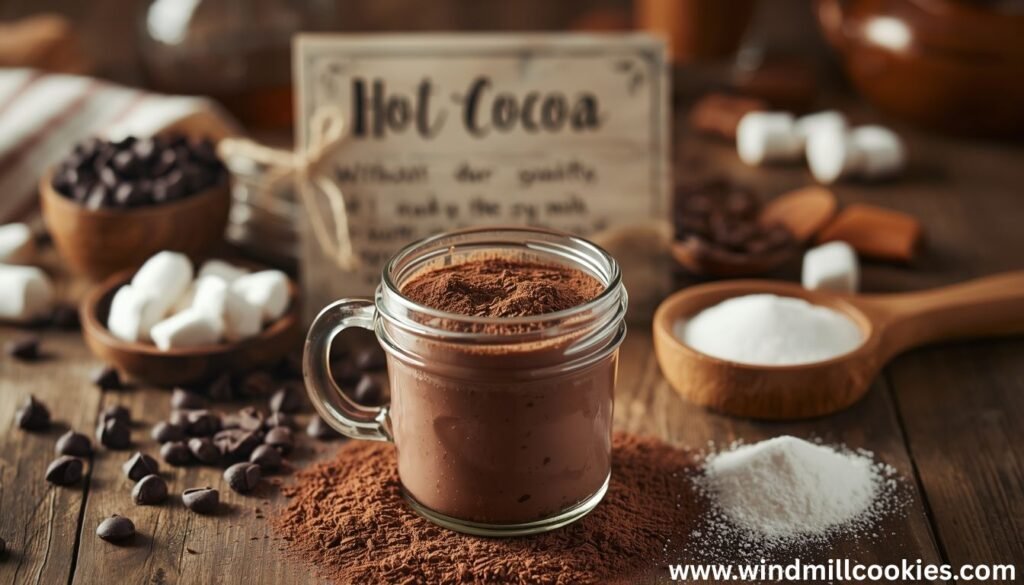
That’s exactly why I developed this hot cocoa mix recipe without dry milk. It’s rich, deeply chocolatey, customizable, and made entirely from pantry staples.
Whether you’re dairy-free, vegan, or looking for a cleaner, homemade option, this recipe gives you full control over flavor and ingredients without sacrificing comfort or indulgence.
What Is a Hot Cocoa Mix Recipe Without Dry Milk?
A hot cocoa mix recipe without dry milk is a powdered blend designed to make hot chocolate without relying on milk powder or dairy-based fillers.
Instead of pre-added milk solids, the mix focuses on cocoa, sweetener, and flavor enhancers, allowing you to add your preferred milk (or water) later.
This style of homemade hot chocolate mix has roots in traditional cocoa preparations, where pure cocoa powder and sugar were mixed directly into hot liquids. Unlike commercial mixes, it avoids preservatives, stabilizers, and unnecessary additives.
The result is a cleaner, more adaptable cocoa mix that works for dairy-free, vegan, and allergy-conscious households.
Why You’ll Love This Recipe
- Deep, rich chocolate flavor without artificial taste
- Naturally dairy-free and easy to make vegan
- Uses simple pantry ingredients
- Customizable sweetness and cocoa intensity
- Perfect for gifting, meal prep, or cozy nights
- Dissolves smoothly with the right technique
- No milk powder, preservatives, or fillers

Ingredients Overview
This homemade cocoa mix relies on quality basics. Each ingredient plays a clear role in flavor and texture.
- Unsweetened cocoa powder – ¾ cup: Use natural cocoa powder for a classic flavor or Dutch-processed for a smoother, darker taste.
- Powdered sugar – ¾ cup: Dissolves easily and creates a smooth hot chocolate. You can adjust to taste.
- Cornstarch – 1 tablespoon: Helps thicken the drink slightly, mimicking the body usually provided by milk powder.
- Salt – ¼ teaspoon: Enhances the chocolate flavor and balances sweetness.
- Vanilla powder or vanilla sugar – 1 teaspoon: Adds warmth and depth. Liquid vanilla is not recommended for dry mixes.
- Optional cinnamon – ½ teaspoon: Adds gentle warmth and a subtle spice note.
Substitutions
- Replace powdered sugar with coconut sugar powder for a refined sugar–free option.
- Use arrowroot powder instead of cornstarch if preferred.
- For a keto-style cocoa mix, use powdered erythritol and omit cornstarch.
Step-by-Step Instructions
How to Make the Cocoa Mix
Sift Dry Ingredients
Start by measuring ¾ cup unsweetened cocoa powder, ¾ cup powdered sugar, 1 tablespoon cornstarch, and ¼ teaspoon salt. Add all ingredients to a fine-mesh sieve placed over a large mixing bowl. Sifting is essential here; it removes stubborn lumps and guarantees a silky-smooth hot cocoa mix without a gritty texture.
This simple step evenly distributes sweetness, cocoa richness, and thickening power in one pass. Don’t rush it. Gently tap or stir the sieve until only fine powder remains.
Proper sifting creates a professional-quality blend that dissolves effortlessly in hot milk or dairy-free alternatives.
Skipping this step can lead to clumps and uneven flavor, so take the extra minute; it makes a noticeable difference in the final cup.

Add Flavorings
Once the dry base is smooth, it’s time to build depth. Add 1 teaspoon vanilla powder or vanilla sugar and ½ teaspoon ground cinnamon directly to the sifted mixture.
These flavorings transform a basic cocoa mix into a rich, bakery-style hot chocolate with warm, comforting notes.
Stir slowly, but thoroughly,y so the vanilla and spice disperse evenly. This step ensures every scoop delivers consistent aroma and balanced sweetness.
Vanilla enhances chocolate intensity, while cinnamon adds subtle warmth without overpowering the cocoa.
Avoid liquid extracts, as moisture can cause clumping and reduce shelf life. Keeping everything dry preserves freshness, improves storage stability, and guarantees a smooth, flavorful cup every time you prepare the mix.
Blend for Smoothness
After adding all ingredients, transfer the mixture to a food processor or high-speed blender. Blend the combined ¾ cup cocoa powder, ¾ cup powdered sugar, 1 tablespoon cornstarch, 1 teaspoon vanilla powder, ½ teaspoon cinnamon, and ¼ teaspoon salt for 10–15 seconds.
This step creates an ultra-fine texture that looks and feels professionally made. Blending breaks down any remaining micro-lumps and evenly distributes flavor throughout the mix.
The result is a silky, uniform hot cocoa base that dissolves effortlessly in hot milk or dairy-free alternatives. Do not over-blend, as excess heat can affect cocoa quality. A quick pulse is enough to achieve smooth, consistent results that elevate the final drink.
Store Properly
Once blended, transfer the finished cocoa mix made from ¾ cup cocoa powder, ¾ cup powdered sugar, 1 tablespoon cornstarch, 1 teaspoon vanilla powder, ½ teaspoon cinnamon, and ¼ teaspoon salt into a clean, dry, airtight container. Proper storage preserves flavor, texture, and freshness.
Choose a glass jar or sealed food-grade container and keep it in a cool, dark place. Avoid heat, humidity, and direct sunlight, as moisture can cause clumping and dull the chocolate flavor. Label the container with the preparation ratio for easy use later.
When stored correctly, this hot cocoa mix without dry milk stays fresh and rich for up to six months, delivering consistent results with every scoop.
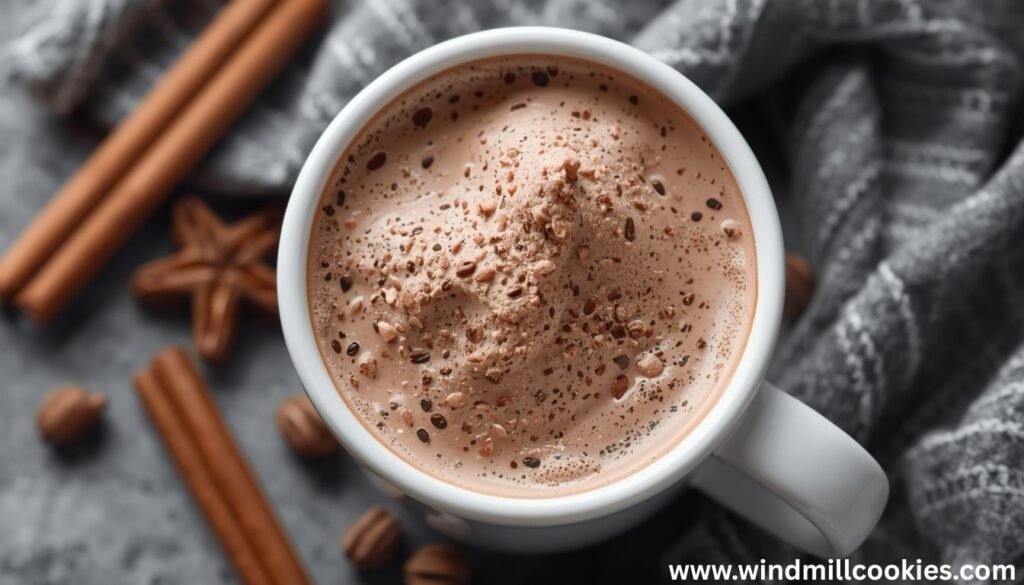
How to Prepare Hot Cocoa
To make one perfect cup, heat 1 cup milk or dairy-free milk over medium heat until steaming, not boiling. Add 2 tablespoons prepared hot cocoa mix and whisk continuously. This slow blending method prevents lumps and creates a smooth, creamy texture.
Continue heating for 1–2 minutes, stirring gently as the cocoa thickens slightly. The cornstarch activates during this step, giving the drink a rich, café-style body without dry milk. Taste and adjust the sweetness if needed.
Pour into a warm mug and serve immediately. For extra indulgence, top with shaved chocolate or a splash of plant-based creamer. This method delivers deep chocolate flavor and consistent results every time.
- Heat 1 cup milk or dairy-free milk (almond, oat, soy, or coconut all work well).
- Whisk 2 tablespoons of cocoa mix into the hot liquid.
- Simmer gently for 1–2 minutes, whisking constantly until smooth and slightly thickened.
- Serve immediately.

Expert Tips for Best Results
Use high-quality ¾ cup unsweetened cocoa powder for bold, rich flavor. This single ingredient defines the entire mix. Always sift and blend the dry ingredients thoroughly to ensure a smooth, lump-free texture that dissolves easily.
When preparing the drink, heat 1 cup of milk or dairy-free milk gently. Boiling can scorch cocoa and mute chocolate notes.
Whisk 2 tablespoons of cocoa mix slowly into warm liquid to activate the 1 tablespoon of cornstarch, which creates natural creaminess without dry milk.
Store the mix in an airtight container to protect freshness and aroma. If the cocoa tastes flat, add a pinch more salt rather than extra sugar. Small adjustments make a big difference in final quality.
Variations & Substitutions
This hot cocoa mix without dry milk is easy to customize. For a vegan version, prepare the mix as written and use 1 cup oat, almond, or soy milk when serving.
To reduce sweetness, replace ¾ cup of powdered sugar with ½ cup of powdered sugar for a darker, more intense chocolate flavor.
For a spiced cocoa mix, add ¼ teaspoon cayenne or an extra ½ teaspoon cinnamon to the dry blend. Craving mocha? Mix in 1 tablespoon instant espresso powder for deep, café-style richness.
If cornstarch is unavailable, substitute 1 tablespoon arrowroot powder for similar thickening results. Each variation maintains smooth texture, bold cocoa taste, and consistent performance without using dry milk.

Storage & Make-Ahead Instructions
Store the dry mix in an airtight container at room temperature for up to 6 months. Keep it in a cool, dry place away from heat and light.
This recipe is ideal for batch prep. Simply double or triple the quantities. Avoid refrigeration, as condensation can introduce moisture.
Prepared hot cocoa should be consumed immediately and not reheated multiple times.
Frequently Asked Questions
Can I make hot cocoa without milk powder?
Yes. This recipe is specifically designed as a hot cocoa mix without milk powder, allowing you to add any milk or dairy-free alternative when preparing the drink.
What milk works best with dairy-free hot cocoa mix?
Oat milk provides the creamiest texture, while almond milk keeps it lighter. Coconut milk adds richness and natural sweetness.
Is this hot chocolate mix vegan?
The dry mix itself is vegan. Just prepare it with plant-based milk and vegan-friendly sugar.
Why does my cocoa taste bitter?
Bitterness usually comes from low-quality cocoa powder or insufficient sweetener. Adding a pinch of salt can also help balance flavors.
Can I use water instead of milk?
Yes, but the drink will be thinner. If using water, consider adding a splash of dairy-free creamer or extra cocoa mix.
How do I prevent lumps in homemade hot cocoa?
Always whisk the mix into warm liquid gradually and avoid boiling. Sifting the mix before storage also helps.
Is this recipe suitable for kids?
Absolutely. You can reduce cocoa intensity slightly and adjust sweetness to taste.

Final Thoughts & Serving Suggestions
This hot cocoa mix recipe without dry milk proves that you don’t need packaged shortcuts to enjoy a comforting, café-style drink at home.
I love serving it with a splash of oat milk, a dusting of cocoa powder, or alongside homemade cookies on chilly evenings. It also makes a thoughtful edible gift when packaged in jars with handwritten instructions.
Whether you’re dairy-free by choice or necessity, or simply want a cleaner homemade option, this recipe delivers warmth, flavor, and flexibility in every cup. Once you try it, you may never go back to store-bought mixes again.>