I still remember the first time I tasted freshly blended almond milk; it was nothing like the store-bought cartons I had been using for years.
That experience pushed me to learn how to make almond milk at home, and honestly, I haven’t looked back since. Making your own almond milk is not just about saving money; it’s about control, purity, and flavor.
It was richer, smoother, and had a naturally sweet, nutty flavor that instantly made me rethink everything I knew about plant-based milk.
You decide what goes in, whether it’s a touch of vanilla, a hint of sweetness, or keeping it completely unsweetened. It’s one of those simple kitchen rituals that feels both nourishing and rewarding.

What Is How to Make Almond Milk?
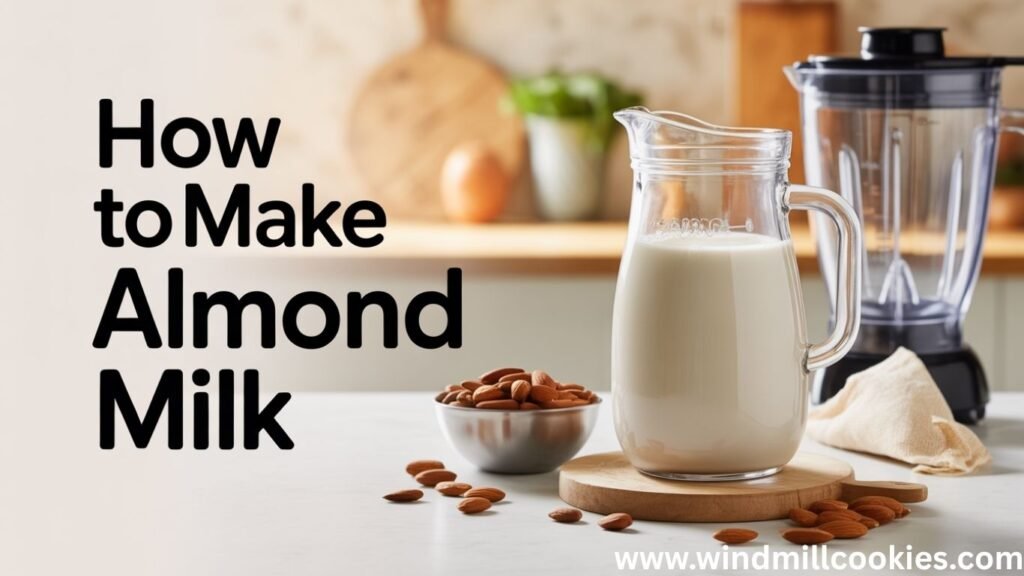
Almond milk is a dairy-free, plant-based beverage made by blending soaked almonds with water and then straining the mixture to remove solids.
The result is a smooth, creamy liquid that can be used in everything from coffee and smoothies to baking recipes.
Historically, almond milk has roots in medieval cuisine, where it was widely used as a dairy alternative during fasting periods. Today, it’s a staple in vegan, lactose-free, and health-conscious diets.
Unlike store-bought versions, homemade almond milk contains no preservatives, stabilizers, or artificial flavors. It’s pure, customizable, and incredibly fresh.
Why You’ll Love This Recipe
- Naturally creamy texture with a rich nutty flavor
- Completely dairy-free, vegan, and gluten-free
- No additives, gums, or preservatives
- Budget-friendly compared to packaged almond milk
- Easy to customize with flavors like vanilla or dates
- Perfect for smoothies, coffee, cereal, and baking
- Ready with minimal ingredients and simple steps
Ingredients Overview
To master how to make almond milk, you only need a handful of ingredients:
Main Ingredients
- Raw almonds – 1 cup: Use high-quality, unsalted almonds. Soaking them enhances texture and digestibility.
- Filtered water – 3 to 4 cups: Use 3 cups for creamier milk, 4 cups for a lighter consistency.
Optional Add-Ins
- Dates – 2 to 3 (pitted): Natural sweetness without refined sugar.
- Vanilla extract – 1 teaspoon: Adds warmth and depth.
- Salt – a pinch: Enhances overall flavor.
Substitutions
- Swap almonds with cashews for a creamier version
- Use maple syrup instead of dates for sweetness
- Add cocoa powder for chocolate almond milk
Step-by-Step Instructions
Soak the Almonds

Start with 1 cup raw almonds and 3 cups clean water. Add almonds to a deep bowl. Pour water fully over. Keep extra space.
Let soak overnight. Minimum 8 hours. This step is game-changing. Texture becomes ultra soft. Blending turns silky smooth.
Soaking removes bitterness. It boosts flavor depth. Nutrients become easier to absorb. Digestive comfort improves.
Drain the next day fully. Rinse well with fresh water. Skins loosen naturally. No peeling needed. This simple step guarantees creamy, rich, barista-level almond milk every time.
Drain and Rinse

Use 1 cup of soaked almonds. Discard soaking water fully. Never reuse this water. Place almonds in a strainer. Rinse under cold, clean water. Rub with your hands gently. This removes residue fast.
Water runs clear. Surface feels fresh. Taste becomes pure and mild. No bitterness remains. Quick rinse improves flavor clarity. It ensures clean, smooth almond milk. This step boosts final quality.
Shake off excess water. Let almonds drain for 1–2 minutes. Now they are perfectly prepped for blending.

Blend
Add 1 cup of soaked almonds into the blender. Pour 3 to 4 cups of cold filtered water. This ratio controls richness.
Blend on high speed. Run for 45 to 60 seconds. Texture turns milky fast. Color becomes pure white.
Power blending releases natural oils. Flavor becomes rich and creamy. This is the secret step. Pause if needed. Scrape sides gently. Blend again for perfect smoothness.
Do not overblend. Heat affects taste. Keep it quick and controlled. You now have a silky, nutrient-rich almond base ready for straining.

Strain
Use a blended mix. From 1 cup of almonds and 3–4 cups of water. Place the nut bag. Or fine cheesecloth. Set over the bowl. Pour slowly.
Liquid flows down. Pulp stays inside. This step creates a silky texture. Gather the cloth edges. Squeeze gently. Then press firmly. Extract every drop.
Do not rush here. Slow strain gives ultra-smooth results. No grainy feel. Yield becomes rich. Flavor turns clean. Texture feels barista-level.
Save almond pulp. Use in baking. Add to smoothies. Zero-waste method.

Add Flavor (Optional)
Pour fresh milk back. Into the blender jar. Add 2 soft dates. Natural sweet boost. No sugar needed.
Add 1 teaspoon vanilla extract. Aroma becomes warm. Taste feels premium. Add a pinch of salt. Flavor pops instantly. Balance improves fast.
Blend for 20 seconds. Texture stays smooth. Taste becomes rich. Try cocoa powder. Use 1 tablespoon. Creates a chocolate version.
Adjust the sweetness level. Control every sip. This step makes it unique. Keep it plain. Or flavor bold. Your almond milk, your style.
Store

Pour fresh milk. Into a clean glass jar. Use airtight lid. The recipe uses 1 cup of almonds and 3–4 cups of water. Yield stays fresh.
Refrigerate immediately. Keep below the cold temperature. This preserves quality. Shelf life lasts 3 to 4 days. Best taste within the first 2 days.
Shake before use. Natural separation happens. This is normal. Avoid plastic containers. Glass keeps flavor pure. No odor transfer.
Do not leave it outside. Room heat spoils fast. Always keep chilled. Freeze in cubes. Use later in smoothies. Smart storage method.
Expert Tips for Best Results
Use 1 cup of almonds. Add 3 cups of water. Ratio matters most. Creaminess depends here. Soak overnight always. Soft almonds blend more smoothly. Texture becomes ultra silky.
Use cold filtered water. Taste stays clean. Flavor feels premium. Blend at high speed. Keep under 60 seconds. Avoid heat buildup.
Strain with a fine bag. Press slowly. Smooth milk guaranteed. Add 1–2 dates. Natural sweetness boost. No refined sugar.
Use pinch salt. Flavor enhances instantly. Depth improves fast. Store in a glass jar. Keep chilled always. Freshness stays longer.
Shake before serving. Separation is natural. Quality remains perfect. Making homemade almond milk is simple, but these tips elevate it:
- Soak longer for a smoother texture: Overnight soaking ensures softer almonds and creamier milk.
- Use cold filtered water: This improves taste and freshness.
- Blend thoroughly but not too long: Over-blending can heat the mixture and affect flavor.
- Strain properly: Use a fine nut milk bag for silky results.
- Don’t waste the pulp: Almond pulp can be used in baking, smoothies, or granola.
- Avoid bitterness: Always use fresh almonds; old ones can taste bitter.
Variations & Substitutions

Use 1 cup of almonds. Add 3–4 cups of water. Base stays the same. Add 2 dates. Sweet taste boost. Natural sugar only.
Add 1 teaspoon vanilla. Flavor turns warm. Aroma feels premium. Mix 1 tablespoon of cocoa powder. Chocolate version ready. Kids love it.
Add a pinch of cinnamon. Light spice note. Comfort flavor rises. Swap almonds. Use the same amount of cashews. Texture becomes extra creamy.
Use maple syrup. Add 1 tablespoon. Smooth sweetness option. Reduce water. Make thick milk. Perfect for coffee use. One of the best parts about learning how to make almond milk is how versatile it is.
Flavor Variations
- Vanilla Almond Milk: Add 1 teaspoon vanilla extract.
- Chocolate Almond Milk: Blend in 1 tablespoon of cocoa powder and 2 dates.
- Cinnamon Spice Milk: Add a pinch of cinnamon and nutmeg.
Dietary Adaptations
- Keto-Friendly: Skip dates and sweeteners entirely.
- Low-Calorie Version: Use more water for a lighter consistency.
- Protein Boost: Blend with a tablespoon of chia seeds.
Storage & Make-Ahead Instructions
Proper storage keeps your almond milk fresh and safe.
- Refrigeration: Store in an airtight glass container for up to 3–4 days.
- Shake Before Use: Natural separation is normal, just shake well.
- Freezing: You can freeze almond milk in ice cube trays for smoothies.
- Make-Ahead Tip: Soak almonds in batches and freeze them for quicker preparation later.
Frequently Asked Questions (FAQ)
How long does homemade almond milk last?
Homemade almond milk typically lasts 3–4 days in the refrigerator when stored properly.
Do I need to peel the almonds?
No, peeling is optional. Leaving the skins on adds fiber and nutrients.
Can I make almond milk without soaking almonds?
Yes, but soaking improves texture and flavor significantly.
Why is my almond milk watery?
You may have used too much water. Try a 1:3 almond-to-water ratio for creamier results.
What can I do with leftover almond pulp?
Use it in baking, smoothies, oatmeal, or energy balls.
Is homemade almond milk healthier than store-bought?
Yes, it contains no additives or preservatives and is more natural.
Can I use almond milk for coffee and tea?
Absolutely. Use a thicker version (less water) for better creaminess.

Final Thoughts / Serving Suggestions
Now that you know exactly how to make almond milk, you’ll realize just how easy and rewarding it is to prepare this wholesome drink at home.
It’s fresh, customizable, and far superior in taste compared to anything you’ll find on store shelves.
I love using it in my morning coffee, blending it into smoothies, or pouring it over cereal. It’s also perfect for baking, especially in dairy-free recipes.
Whether you enjoy it plain or flavored, homemade almond milk fits beautifully into everyday life.